The DS18B20 is a simple and inexpensive temperature sensor. The sensor operates by an OneWire system, which needs, besides the connections for ground and the supply voltage, only one wire to read the temperature values. By this bus system, it is possible to run multiple sensors which is also described in this tutorial.
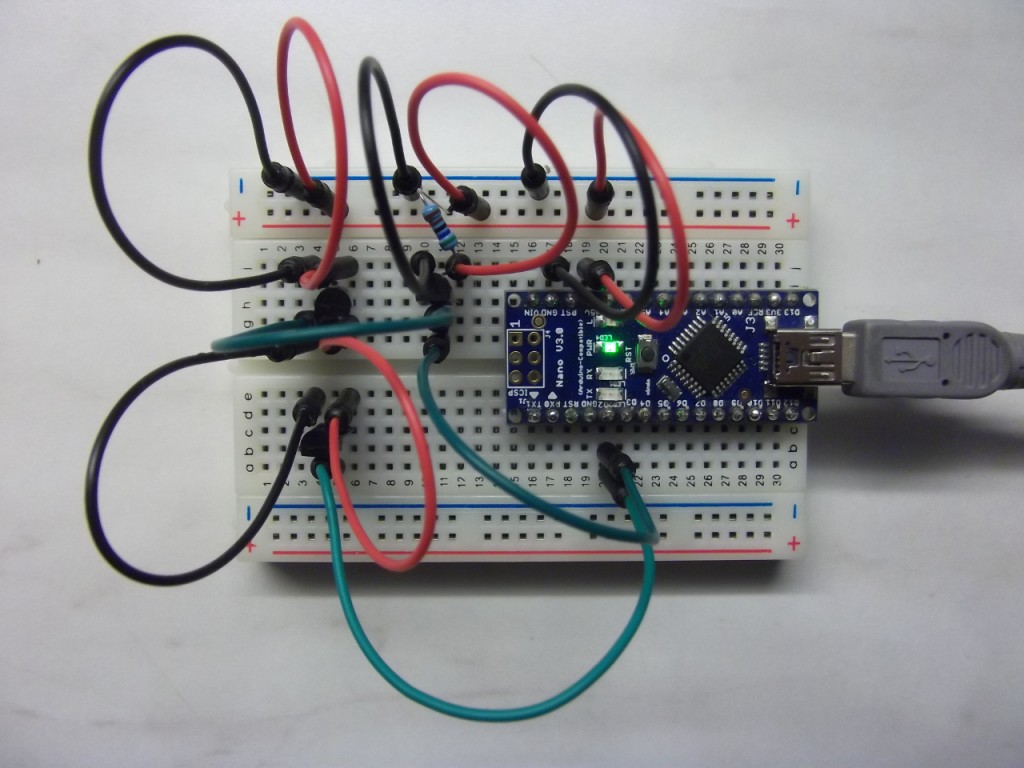
The wiring is very simple, we additionally require, however, a 4.7 kOhm resistor, the following plan clarified this:
Source code (Sketch) :
For the sketch we need to install two additional libraries:
- the Arduino-Temperature-Control-Library from Miles Burton
- the OneWire-Bibliothek from Paul Stoffregen.
Once this is done, we copy only the following code into a new sketch and upload it to our Arduino:
#include <OneWire.h>            // OneWire-Bibliothek einbinden
#include <DallasTemperature.h>  // DS18B20-Bibliothek einbinden

#define DS18B20_PIN 2   // Pin für DS18B20 definieren Arduino D2

OneWire oneWire(DS18B20_PIN);          // OneWire Referenz setzen
DallasTemperature sensors(&oneWire);   // DS18B20 initialisieren

void setup() {

	// Serielle Ausgabe starten
	Serial.begin(9600);
	Serial.println("Temperaturmessung mit dem DS18B20 - blog.simtronyx.de");

	sensors.begin();  // DS18B20 starten
	Serial.print("Sensoren: ");

	Serial.println(sensors.getDeviceCount());
}


void loop(){

	sensors.requestTemperatures(); // Temperatursensor(en) auslesen
	for(byte i=0;i<sensors.getDeviceCount();i++){	// Temperatur ausgeben
		show_temperature(i+1,sensors.getTempCByIndex(i));
	}

	delay(5000);	// 5s Pause bis zur nächsten Messung
}

// Temperatur ausgeben
void show_temperature(byte num,float temp){

  Serial.print("Sensor ");
  Serial.print(num);
  Serial.print(": ");
  Serial.print(temp);
  Serial.print(" ");  // Hier müssen wir ein wenig tricksen
  Serial.write(176);  // um das °-Zeichen korrekt darzustellen
  Serial.println("C");
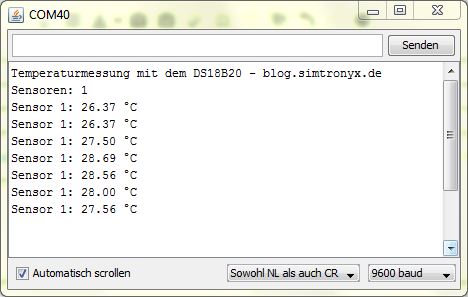
} and start the serial monitor which should display something like this:
Here, the temperature variations were made by placing a finger on the sensor.
Multiple DS18B20 sensors simultaneously
But that’s not all, in the following example, we use two sensors which are individually powered and connected to the one wire bus.
Here is an example with three sensors:
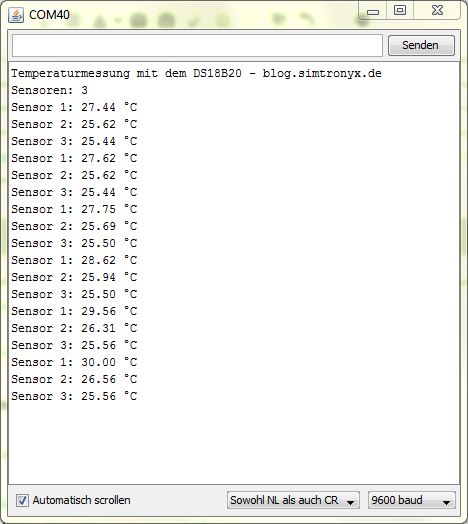
Thus, up to 127 sensors can be connected one after the other. The 4.7 kOhm resistor is – as you can see – only required once. The source code is the same as in the example with one sensor. After starting the serial monitor, the following output should give (again, one sensor was clamped with 2 fingers).
Well then, I wish happy measuring!
Components:
| eBay: | Arduino Breadboard jumper wires resistor 4.7k |
| Amazon: | Breadboard jumper wires resistor 4.7k |
Good?


 Deutsch
 English