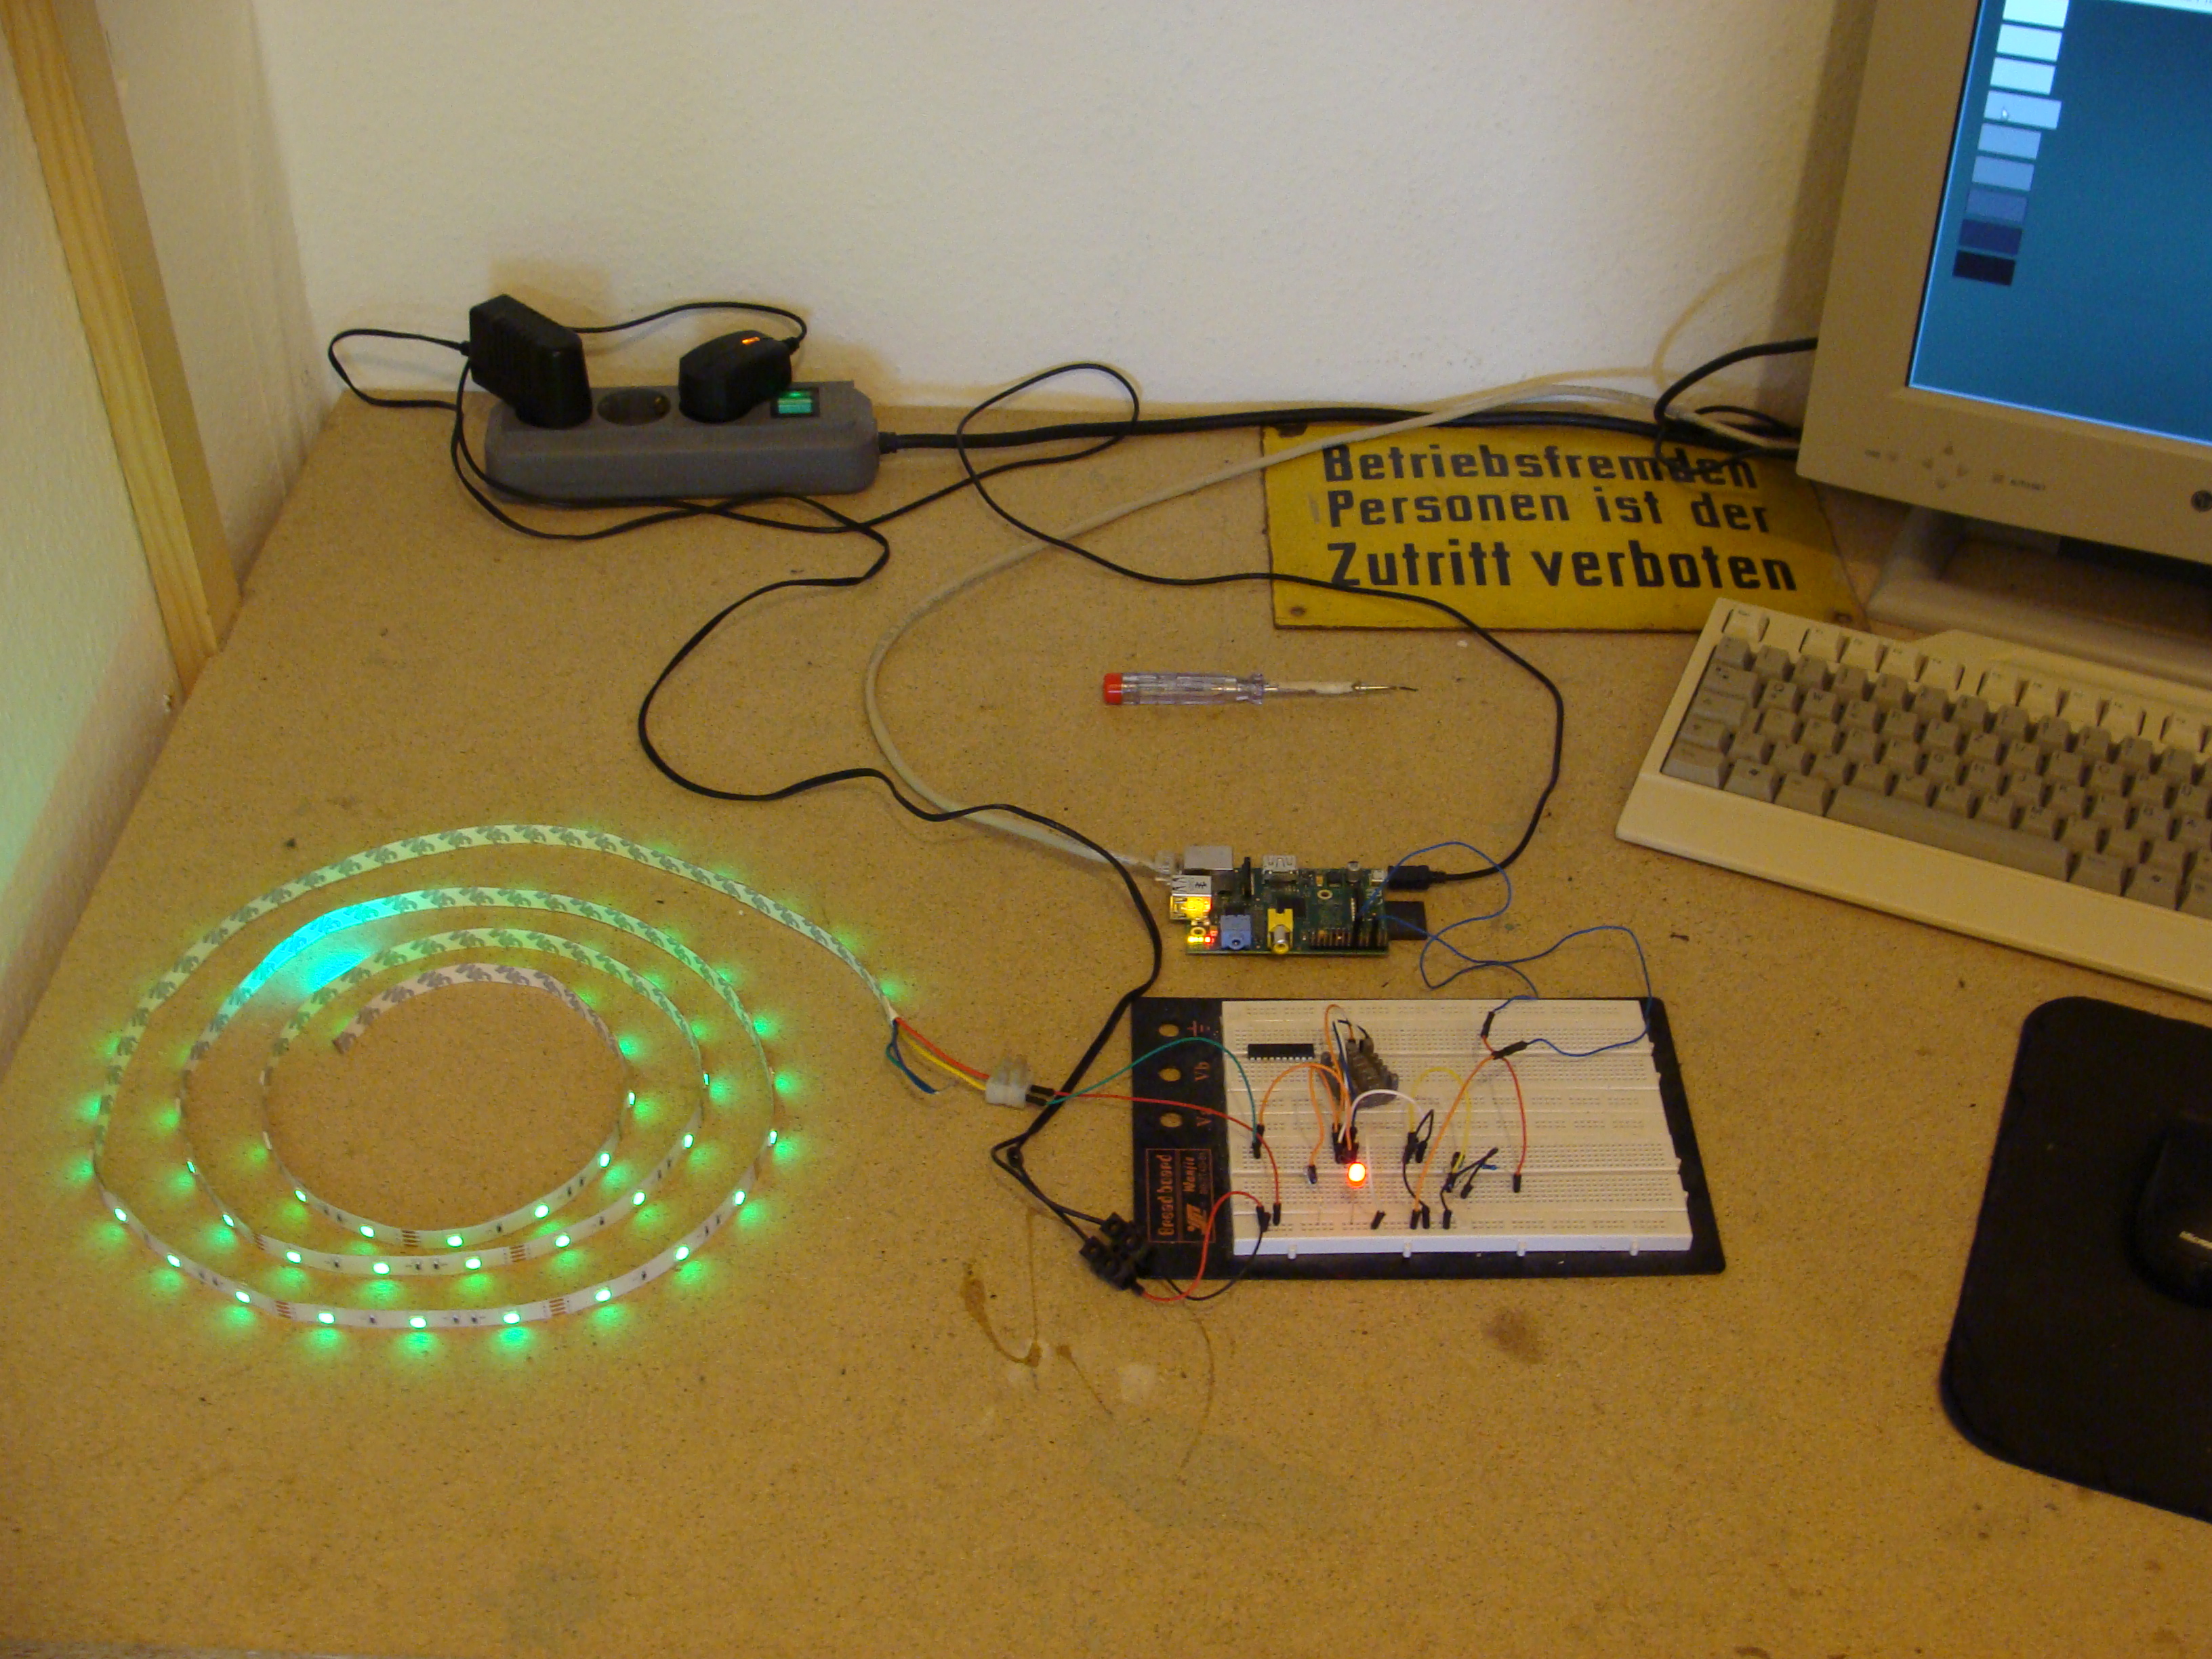
Der Raspberry Pi besitzt an seinem Pin 12 (auf der Konsole 1 und in PHP 18) einen PWM-Ausgang über den wir eine LED dimmen können. Vorausgesetzt wird ein entsprechend vorbereiteter Raspberry Pi wie in der Anleitung LED schalten.
Als erstes schalten wir über die Konsole mit dem Befehl:
gpio mode 1 pwm
den Pin in den PWM-Mode. Mir „gpio readall“ schauen wir nach ob sich was verändert hat.
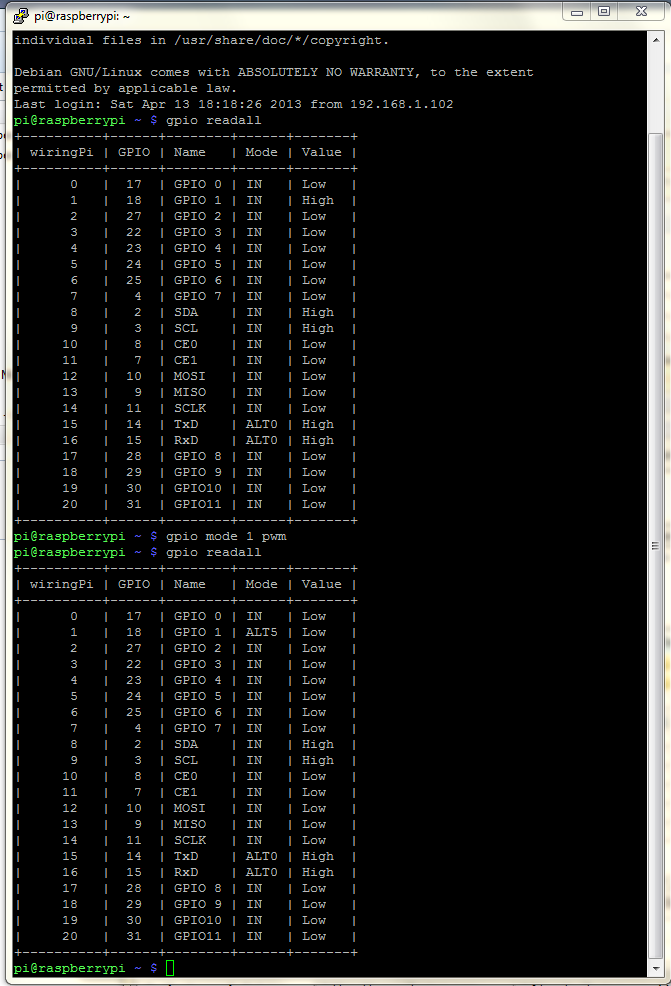
Wie man sieht steht neben GPIO 1 nun „ALT5“. Nun stecken wir die LED, natürlich mit Vorwiderstand, an den Pin 12 und die Masse an Pin 6. Mit dem Befehl:
gpio pwm 1 ZAHL
(ZAHL muss ein Wert zwischen 0 und 1023 sein) lässt sich die LED nun bereits per Konsole dimmen. Ist alles soweit richtig, machen wir die Konsole zu und kopieren die folgenden drei Dateien per Filezilla auf den Raspberry Pi.
index.php
<html>
<head>
<meta http-equiv="Cache-Control" content="no-cache">
<meta http-equiv="pragma" content="no-cache">
<meta http-equiv="expires" content="-1">
<script type="text/javascript" language="javascript">

    function schalten(url) {

        auf(url);
	var url1 = "dimmer.php?box=";
	var url3 = url1+url;
        http_request = false;

        if (window.XMLHttpRequest) {
            http_request = new XMLHttpRequest();
            if (http_request.overrideMimeType) {
                http_request.overrideMimeType('text/xml');
            }
        } else if (window.ActiveXObject) {
            try {
                http_request = new ActiveXObject("Msxml2.XMLHTTP");
            } catch (e) {
                try {
                    http_request = new ActiveXObject("Microsoft.XMLHTTP");
                } catch (e) {}
            }
        }
        http_request.open('GET', url3, true);
        http_request.send(null);
    }

function auf(box) {
document.getElementById(box).style.width = 110;
}
function zu(box) {
document.getElementById(box).style.width = 90;
}
</script>
<link rel="stylesheet" type="text/css" href="dim.css">
</head>
<body>
<div id="box1" class="box" onmouseover="schalten('box1')"; onmouseout="zu('box1')">
</div>
<div id="box2" class="box" onmouseover="schalten('box2')"; onmouseout="zu('box2')">
</div>
<div id="box3" class="box" onmouseover="schalten('box3')"; onmouseout="zu('box3')">
</div>
<div id="box4" class="box" onmouseover="schalten('box4')"; onmouseout="zu('box4')">
</div>
<div id="box5" class="box" onmouseover="schalten('box5')"; onmouseout="zu('box5')">
</div>
<div id="box6" class="box" onmouseover="schalten('box6')"; onmouseout="zu('box6')">
</div>
<div id="box7" class="box" onmouseover="schalten('box7')"; onmouseout="zu('box7')">
</div>
<div id="box8" class="box" onmouseover="schalten('box8')"; onmouseout="zu('box8')">
</div>
<div id="box9" class="box" onmouseover="schalten('box9')"; onmouseout="zu('box9')">
</div>
</body>
</html>
dim.css
body{
background-color:#2F4231;
margin:0;
padding:0;
overflow-x:hidden;
}

.box{
position:absolute;
left:30px;
width:90px;
height:40px;
padding:0px;
margin:0px;
border:1px solid black;
z-index:1;
-moz-opacity:0.6;
filter:Alpha(opacity=60);
}

#box1{ background:#FFFFFF; top:10px;}
#box2{ background:#DDDDDD; top:60px;}
#box3{ background:#CCCCCC; top:110px;}
#box4{ background:#AAAAAA; top:160px;}
#box5{ background:#888888; top:210px;}
#box6{ background:#666666; top:260px;}
#box7{ background:#444444; top:310px;}
#box8{ background:#222222; top:360px;}
#box9{ background:#000000; top:410px;}
dimmer.php
<?php

if($_GET['box'] == "box1") {$x = 1023;}
if($_GET['box'] == "box2") {$x = 800;}
if($_GET['box'] == "box3") {$x = 600;}
if($_GET['box'] == "box4") {$x = 400;}
if($_GET['box'] == "box5") {$x = 300;}
if($_GET['box'] == "box6") {$x = 200;}
if($_GET['box'] == "box7") {$x = 100;}
if($_GET['box'] == "box8") {$x = 10;}
if($_GET['box'] == "box9") {$x = 0;}

$val = trim(@shell_exec("/usr/local/bin/gpio -g pwm 18 '$x'"));
?>
Beim überfahren der DIV-Elemente mit der Maus wird nun jedesmal ein Ajax-Request an die Datei dimmer.php abgesetzt, welche dann per exec den PWM-Wert ändert.
Hier noch ein Video wie das Ganze aussieht:
Bauteile (Bezugsquellen):
| eBay: | Breadboard LED Raspberry Pi |
| Amazon: | LED Raspberry Pi |
Gut?
 Deutsch
 English