Sensors, like the DHT11, are virtually the senses in the world of microcontrollers. With them you can observe, for example, environmental influences, and possibly respond. In this case we deal with the temperature and humidity measurement and therefore we have almost a small weather station.

Temperature & humidity measurements with the DHT11
For this we use a very inexpensive and easy to be procured DHT11 sensor. If you are wondering about the other board, is this is an Olimexino-32U4, an Arduino Leonardo clone from Bulgaria.
All we need is a couple of jumper wires and a 10k resistor.
Source code (sketch):
First we need to download install the Adafruit DHT-Library from GitHub. Then we simply copy the following code into a new sketch upload it to the Arduino.
#include "DHT.h"   // Adafruit DHT-library

#define DHTPIN 4   // measurement on Pin D04

// we use the DHT11
#define DHTTYPE DHT11   // DHT 11
//#define DHTTYPE DHT22   // DHT 22  (AM2302)
//#define DHTTYPE DHT21   // DHT 21 (AM2301)

DHT dht(DHTPIN, DHTTYPE);  // init

void setup() {

  Serial.begin(9600);
  Serial.println("DHTxx test!");

  dht.begin();
}

void loop() {

  float h = dht.readHumidity();
  float t = dht.readTemperature();

  if (isnan(t) || isnan(h)) {
    Serial.println("ERROR - Could not read the sensor.");
  }
  else {
    Serial.print("Humidity: ");
    Serial.print(h);
    Serial.print(" %\t");
    Serial.print("Temperature: ");
    Serial.print(t);
    Serial.print(" ");
    Serial.write(176);
    Serial.println("C");
  }
}
Now that we’ve uploaded the program to the Arduino, we open the serial monitor and should now get new values in short intervals, for example as in my case, these:
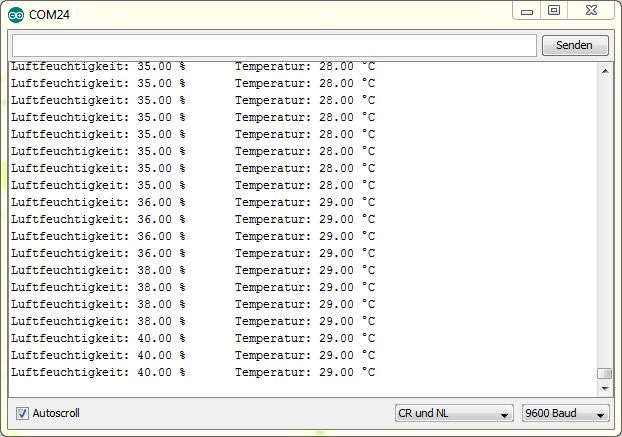
easy to recognize here is the temperature and humidity increase, after I breathed the sensor.
Components:
| eBay: | Breadboard jumper wires Resistor 10k |
| Amazon: | Resistor 10k |
Good?
 Deutsch
 English